Friday, April 26, 2019

SugarPea Designs Day Five

Today is the final day of the sweet peeks of the SugarPea Designs April release!  The release will be available on Friday, April 26th at 6 pm EST in the SugarPea Designs store.  Today, we have two stamps sets: Graduation and Follow Your Dreams along with a new word die, Congrats.    


 I have two cards to share with you today.   I used the new Graduation stamp set and the new Card Front Element Builder II SugarCut.   I die cut the panel with the largest die and then die cut it twice with the skinny strips.   I die cut the fish tail banner from orange card stock and die cut a pierced circle with white card stock.   


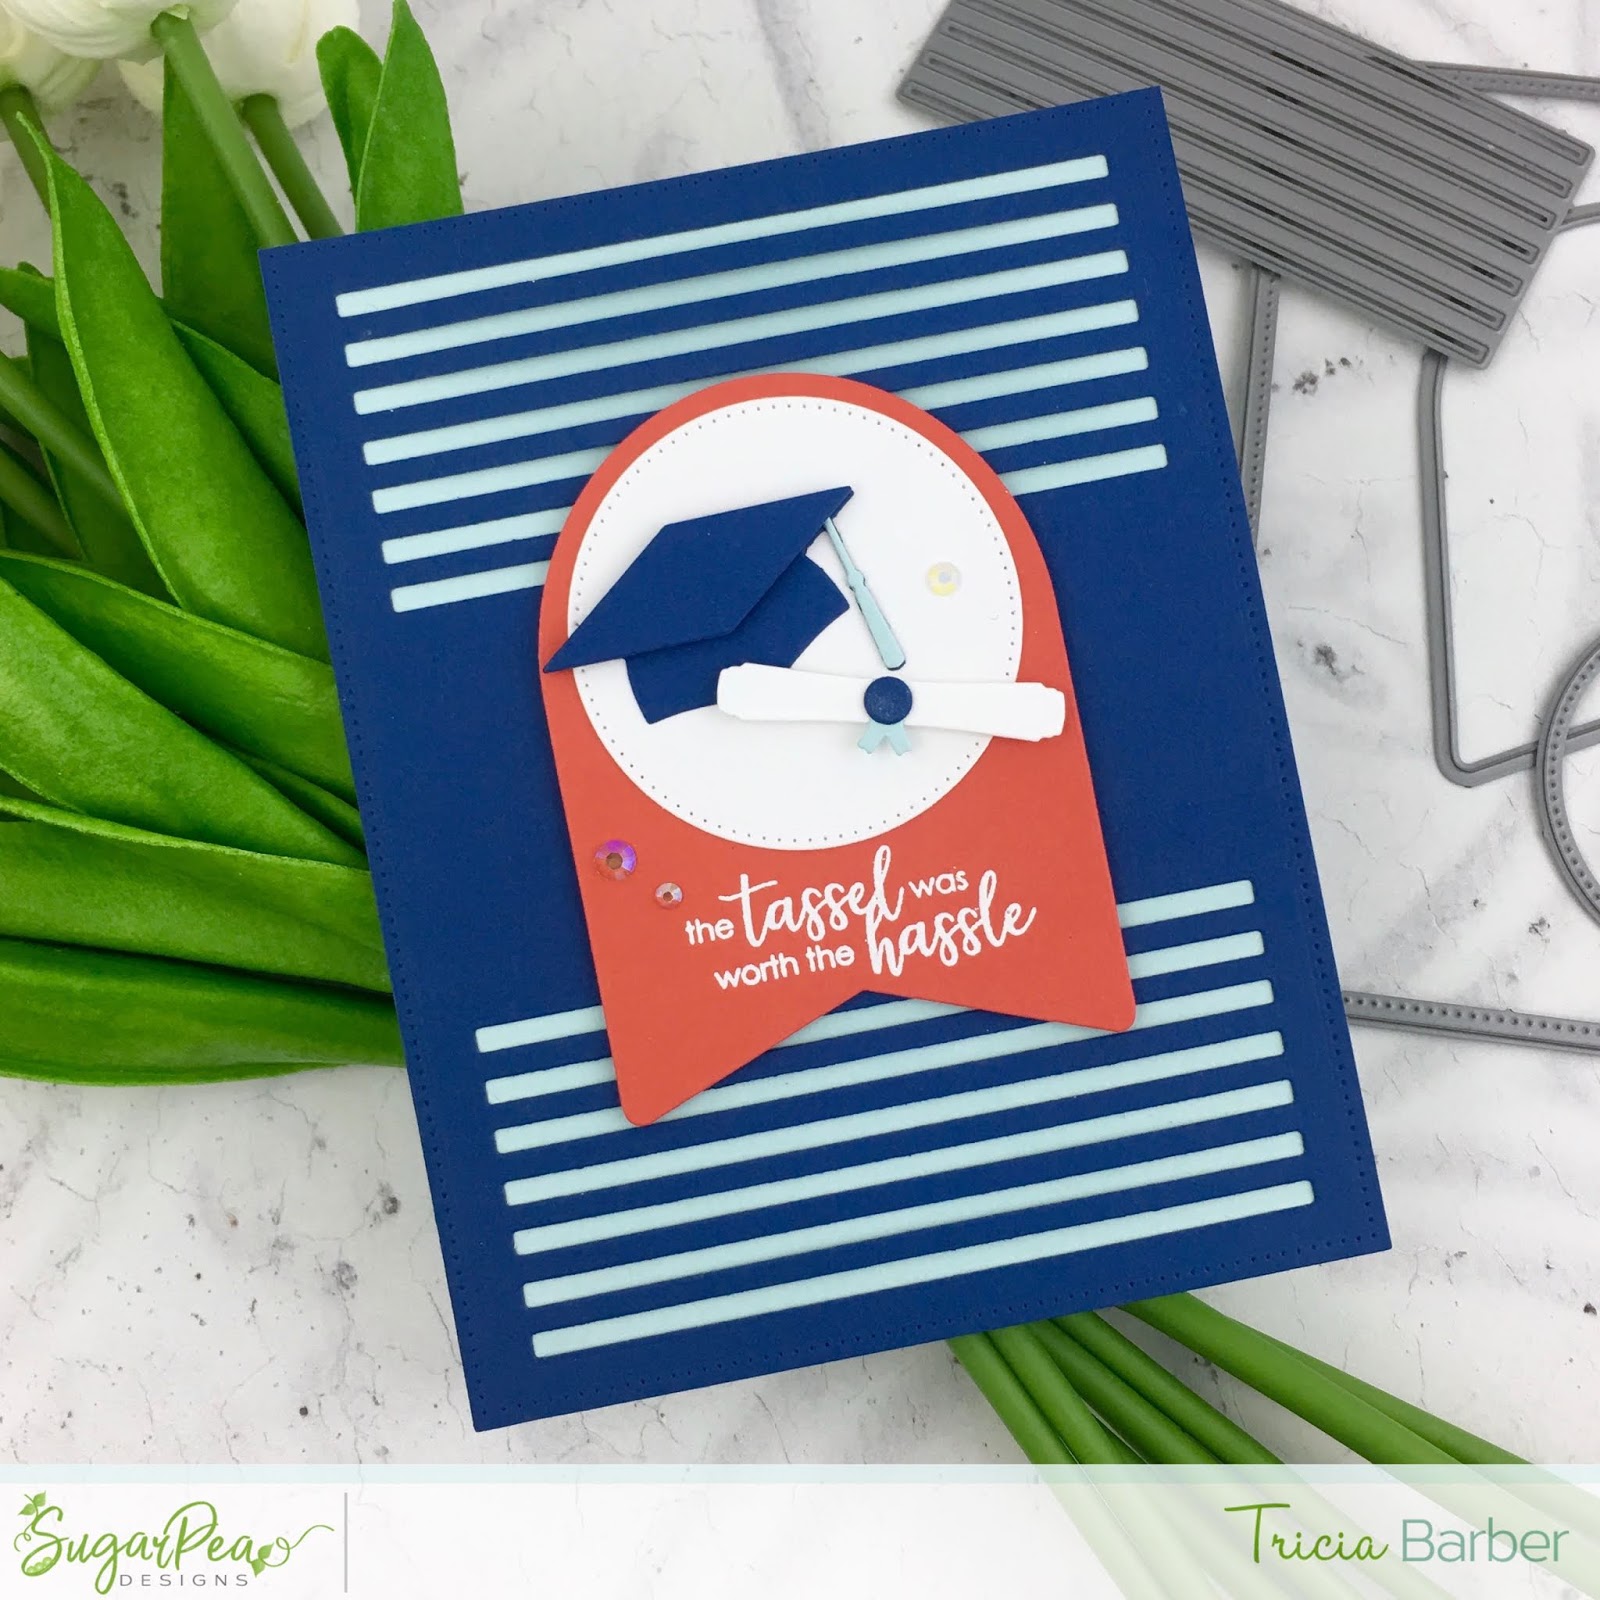
From the Graduation SugarCut I die cut the graduation hat, tassel and scroll from blue, light blue and white card stock.   I stamped the sentiment and white heat embossed it on the fishtail banner.   I added some clear jewels to accent the card.   The panel was placed onto a soft blue card base.   I love that the Graduation stamp set and matching Graduation SugarCut provide you options for either using the stamped images or a die cut element.  


Next up, I created a card with the Follow Your Dreams stamp set and used the new Stacked Honeycomb to create my card panel.    


I die cut the honeycomb out of watercolor card stock and watercolored them with Distress Inks.  After they were dry, I stamped with the accent images on the watercolored honeycomb's and embossed them with white embossing powder.   


I filled the white card base with each of the colored pieces.  I took the card panel and die cut it with the largest die from the Card Front Element Builder II SugarCut.   I then stamped a sentiment onto the fishtail banner from the Card Front Element Builder II and added sequins to the card.  


I hope that you have enjoyed this week with all the sweet peeks!  There are so many cute products available in this release!!!  The new release is available for purchase in the SugarPea Designs Shop on Friday, April 26th at 6 pm EST.    Be sure to hop along to all the designers below to see what they have to share with you today!   Be sure to leave comments along the way for a chance to win!  More details are on the SugarPea Designs blog! 


I would love it if you would follow me on Instagram and Pinterest

Thank you for stopping by! 


Reverse Confetti Stock Your Stash - Father's Day

I have a Father's Day card to share today with the Stock Your Stash Card Challenge with Reverse Confetti.   The theme is Mom's, Dad's and Grad's.    


There is an older Father's Day called Tie-Rific and it is a favorite.  I love the images and the font in the stamp set.  I paired it with the new Mom & Dad Word Duo.   The card panel was die cut with the Diagonal Stitches Cover Panel.    I used the Cue the Confetti 6x6 paper pad to create my shirt.   I die cut the tie from the Tie-Rific Confetti Cut from Royal Purple card stock.    


The sentiment is from Tie-Rific and was stamped onto a sentiment die cut from Flowers for Mom Confetti Cut.   I die cut the Dad word from Iced Aqua card stock and also die cut three more with white card stock.   I love all the dimension it gives to the word die.  For the inside of my card, I stamped another sentiment on the inside of the card.    


I die cut another white card panel with the Diagonal Stitches Cover Panel and trimmed it down and adhered three sides to the lower half of the card and created a gift card holder.  


There is still time to play along with this month's challenge for a chance to win!    Click on this link to find out more details on the challenge! Come check it out and play and if you post your creations on social media, please be sure to use the hashtag: #SYSChallenge


Thanks for stopping by!   Hope you will play along! 


Thursday, April 25, 2019

SugarPea Designs April Release Day Four


Hey Sugar Peeps!   Today is day four of the sweet peek week and we are sharing with you today Sprout Bloom Grow stamp set and SugarCuts!   It is such an adorable set!    I decided to make a scene using the cute little cat and rain boot.   There is so many ways that you can use the images to make a scene.   I stamped the images from Sprout Bloom Grow and then colored with my Copic markers and die cut the images with the Sprout Bloom Grow SugarCuts.   I added details with my white gel pen.


I used some patterned paper from Spots & Stripes Brights Patterned Paper Collection for my grass.   I used some Distress Oxides to create my sky and pulled it out from one corner to the center.  I stamped a sentiment from the set onto a banner from the Card Front Element Builder II and then trimmed it down. 

The clouds and sun are from Whatever the Weather SugarCuts.  I finished it off with some clear sequins.  


That is it for me today!  Please be sure to come back for the the final day off the sweet peek for our last day of the SugarPea Designs April Release!  Be sure to hop along to all the designers below to see what they have to share with you today!   Be sure to leave comments along the way for a chance to win!  More details are on the SugarPea Designs blog! 


I would love it if you would follow me on Instagram and Pinterest
Thank you for stopping by! 


Wednesday, April 24, 2019

SugarPea Designs April Release Day Three

I am back again today to share with you another new stamp and die set, You're My Type from SugarPea Designs! 


The You're My Type SugarCut gives you the choice of die cutting the stamped typewriter or you can build your own typewriter!   So much fun!   This set has a retro vibe to me, maybe you are not old enough to remember actual typewriters, it was an actual High School class in my day!  I remember having an old typewriter at home! 


I knew I wanted to use pink and aqua for my typewriter.   We had a pink refrigerator growing up!  You can create a ton of cute messages on the paper for the typewriter.  I stamped a small aqua heart to my little message.   I layered it on my card with foam tape and used a little extra under the paper to have it pop up just a little bit more from the panel. 


To create my card panel, I started with the new Honeycomb Cover Panel and dry embossed it on some Kraft card stock.   The dry embossing on my card panel is stepped up a couple of notches.   I layered three pieces of card stock together that had circle die cut from the center and placed it on top of my die and then the card stock.   You need to figure out the sandwich on your die cut machine.   With the center cut out of the cardstock shim, the die does not make an impression in the center.   This left me a focal spot.  I then used white pigment ink and buffed around the card panel to add more depth to the impressed Honeycomb Cover Panel.   


For my sentiment, I die cut the sentiment strip from Card Front Element Builder II SugarCut from black cardstock and white heat embossed it with the Friend stamp from You're My Type.  This sentiment reminds me of the old typewriter sets and what the keys use to look like on a manual typewriter.   


That is it for me today!  Please be sure to come back for the next two days for more great new products from the SugarPea Designs April Release!  Be sure to hop along to all the designers below to see what they have to share with you today!   Be sure to leave comments along the way for a chance to win!  More details are on the SugarPea Designs blog! 

I would love it if you would follow me on Instagram and Pinterest!  

Thank you for stopping by!  

Tuesday, April 23, 2019

SugarPea Designs April Release Day Two

I am back again today sharing some sneak peaks of the SugarPea Designs April release!    Today, we are sharing the most adorable stamp set ever, Strike Up the Band!  We are also sharing a new SugarCut, Card Front Element Builder II.   I have a card to share with you today with Strike Up the Band stamp set and it will fast become one of your favorites for sure!  It has the cutest images ever!  I love every single one of them.   They are so much fun to color.  I can tell you that I stamped this set out several times and have colored it over and over.


  You might notice some new dies as well.   I just have to share a picture of the new Card Front Element Builder II below along with the new Stacked Honeycombs that I have used on my card today.    The Card Front Element Builder II has the stacked strips die that you can use multiple ways!    I used it twice on my card putting it in the upper and lower part of the card panel that had been cut with the stitched A2 panel die.   You could stack it three times, stack it twice together, twice apart like I have it and you could do it vertical! I can't wait to see what others do with this die! 


Now back to those cute images from Strike Up the Band,  I colored the images with my Copic markers.    I wanted to make each image stand out on the card, so I die cut the Stacked Honeycomb SugarCuts with white cardstock and then ink blended with Fossilized Amber Distress Oxide onto the bottoms of each hexagon.  


I then die cut some light blue card stock with the Card Front Element Builder II with the largest A2 die and then used the stacked strips and die cut from the top and the bottom.   I used the sentiment die from the Card Front Element Builder II and stamped a sentiment from Strike Up the Band.   


Ok, I have another card to share because I could not stop with these images from Strike Up the Band. I made a slimline card using all the images from the stamp set.   These are great cards when you want to use up all those images all at once on one card!


Can you tell how excited I am about this set!   I can hear the music playing when I look at this card!   These cuties are marching forward and parading across the card!   And those little hats!!!! :-) Total CUTENESS OVERLOAD!   


 I colored them with my Copic markers and die cut them out with the Strike Up the Band SugarCuts.    I used some Spun Sugar and Squeezed Lemonade Distress Oxide inks and ink blended them across the panel that is sized to 3.5 x 8.5.   I then splattered it with some watered down white paint.  


 I added details with my white gel pen.    I also added some colored jewels.   The sentiment was stamped in Versafine Onyx Black ink and then clear heat embossed.   I added the musical notes on both sides of the sentiment.   It's a parade of the cutest little animals!    These slimline cards will fit into a Business size envelope!


That is it for me today!  Please be sure to come back for the next three days for more great new products from the SugarPea Designs April Release!  Be sure to hop along to all the designers below to see what they have to share with you today!   Be sure to leave comments along the way for a chance to win!  More details are on the SugarPea Designs blog! 


SugarPea Designs Blog
Amy Kolling
Jeanne Jachna
Lea Lawson
Kelly Lunceford
Kerin Sylvester
Raluca Vezeteu
Simonne Clay
Stéphanie Beauchemin
Tatiana Trafimovich
Tricia Barber - You are here!
Vera Yates


I would love it if you would follow me on Instagram and Pinterest!

Thank you for stopping by!   


Monday, April 22, 2019

SugarPea Designs April Release Day One

Hey there!  I am so excited to share my first release with SugarPea Designs!    You are going to love this new release!  There are some adorable new products coming your way!   For today's release I am sharing the new stamp set, Honey Bear, along with the Honeycomb Cover Plate.    


The cute bear in the Honey Bear stamp set can be paper pieced or stamped out.   I went for the paper pieced look using the Honey Bear SugarCuts.     I added some Picked Raspberry Distress Oxide ink for the cheeks and added highlights.    


For my background, I used the Honeycomb Cover Plate with some bright yellow card stock thru my die cutting machine.   I used some ClingWrap to keep the pieces intact as I transferred it to a white card base.  I removed some of the pieces of Honey Comb to have the white show through.   I then die cut a circle with the Zig Zag Stitched Circles and stamped my sentiment from Honey Bear and then stamped a bee and die cut it out with the Honey Bear Sugar Cuts.   I added some clouds with Tumbled Glass Distress Oxide and then layered all my elements onto the card base.  I finished it off with some blue jewels.   


Be sure to hop along the blog hop today to see all of the designers sneak peek projects!   Have fun hopping along! 


That is it for me today!  Please be sure to come back for the next four days for more great new products from the SugarPea Designs April Release!  Be sure to hop along to all the designers below to see what they have to share with you today!   Be sure to leave comments along the way for a chance to win!  More details are on the SugarPea Designs blog! 


SugarPea Designs Blog
Amy Kolling
Jeanne Jachna
Lea Lawson
Kelly Lunceford
Kerin Sylvester
Raluca Vezeteu
Simonne Clay
Stéphanie Beauchemin
Tatiana Trafimovich
Tricia Barber - You are here!
Vera Yates


I would love it if you would follow me on Instagram and Pinterest!

Thank you for stopping by!