Monday, February 26, 2018

Reverse Confetti - February SFYTT


Here is my take on this month's Reverse Confetti SFYTT Challenge.    I don't know about you this past week but our weather has been super spring like.   My springs trees are all blooming and my spring bulbs are popping up all over the place.    I am ready for the leaves to start popping out and say goodbye to winter!


I pulled out my Paw Prints stamp set along with Figure of Speech.    I stamped the puppy from Paw prints onto Premier Polar White cardstock and colored him with my Copic markers.   I then stamped two of the speech bubbles from Figure of Speech with Versafine Onyx Black to get a really bold image and then heat embossed with clear embossing ink.  


I wanted pops of bright colors on my background so I went with two of the patented papers from Every Little Bit 6x6 paper pad.   For the bright yellow, I used the Lacy Scallop Frames to create a window for the multicolored patterned paper.  My little dog was popped up on a pierced circle from Flowers for Mom Confetti Cuts.


I hope that you get a chance to play along with this month's sketch and be sure to link up for a chance to win a gift certificate to the Reverse Confetti Store!    All the details can be found on the SFYTT link on the Reverse Confetti blog!


Saturday, February 17, 2018

Reverse Confetti - Banner In Bloom & Something Wonderful

Happy Saturday!   I hope you are able to get your craft on this weekend!   I decided to do something a little different today and did a floral card!   Shocking I am sure, if you look back in my blog, you will note I am a critter girl.    I made this for my mother who just had surgery.  I wanted to do something really bright and cheery.  


I started by creating my background with the Squared Off Cover Panel Confetti Cuts and die cut from Midnight cardstock.    I then trimmed two of the center rows and added Iced Aqua cardstock behind the open squares.    I had trimmed it down to add my sentiment and stamped it directly onto the white A2 card base.    The sentiment comes from the stamp set Something Wonderful.  I stamped it in Versafine Black Onyx ink and then clear heat embossed it.    


I stamped the images from Banner in Bloom and colored with my Copic markers.  I then die cut them out with the Banners in Bloom Confetti Cuts.   I colored them a sherbet colored rainbow.   I added some Clear Sparkle from my Spectrum Noir pen.    The cover panel and flowers were popped up on the card base.   For a final touch, I added some clear sparkle sequins.    


I am participating in several challenges today with this card: 


and 

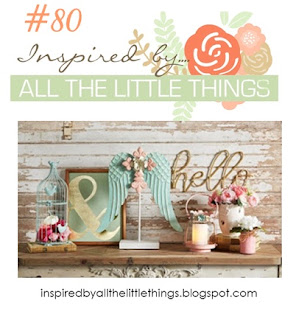
Inspired by all the Little Things Challenge #80 (I used the sherbet colors of the inspiration photo to pick the colors for my flowers and loved all the Aqua in the photo.)


Thanks for stopping by!   I hope that you get some crafty time in with the holiday weekend! 


SaveSave

Friday, February 16, 2018

Reverse Confetti - S'more Love

Happy Friday Fetti' Friends!   Last weekend I played around with Mission Gold watercolors that I got for Christmas and made some galaxy backgrounds.    I decided that they also looked like a northern winter sky with lots of snow!   I had an idea to use the Reverse Confetti Tall Triangle dies to create some Glacier's.   The layout was similar to a card I made last year here but in a different setting.   Now I had just the right background for the penguins from S'more Love.  


 I stamped my penguins from S'More Love onto Premier Polar White cardstock and colored with my Copic Markers and die cut them with the S'more Love Confetti Cuts.    Next, I used the Tall Triangles and the grassy border die from Nuts About You Confetti cuts  to create my glaciers and snow bank.    I then layered the die cut pieces onto the watercolor panel.  


Next, I decided to add a lot os sparkle and shimmer to my card.   The glaciers tops were covered in glue and then I sprinkled some clear glitter on top.   Next I added some Sparkle glitter with my Spectrum marker on the heart.   I covered the heart and the noses with a Clear Pico Embellisher.  I then added some Crystal Darice Sequins.  These will pick up the color of whatever you place them on. They are some of my favorite sequins.  I just love adding a little sparkle! 


I trimmed the panel down to 3 3/4 inch by 5 inches.   This gave a great border of the Mist cardstock base.   I forgot about adding and sentiment and did not want to cover the background so I stamped it directly to the background and then white heat embossed it.  


I hope you get a chance to get crafty this weekend!  


Wednesday, February 14, 2018

Newton's Nook - Cosmic Newton

Hello!   Happy Thursday!   One more day till Friday!   Do you have any big plans for the weekend?   I wish I had some R&R planned but don't think it is in the cards for me this weekend!   I picked up this stamp set back a few months ago and had not gotten a chance to use it.   Last weekend I made some galaxy backgrounds playing around with some new watercolors and decided that it was a perfect time to ink these up!  


I created two cards to share.   I stamped and colored the images with my Copic Markers and then trimmed them out.    I watercolored another piece of water color cardstock and used it to make my moon for both my cards.  


I stamped my sentiment and then white heat embossed it.   I used my Mission Gold watercolors to create the background.   I trimmed the panel down to 3 3/4 x 5 inches and then placed it on a white card base.


For my next card, I had a little trouble with the stamped image.   I used my Pico Embellisher to add clear coat to the window but I was a little impatient waiting for it to dry and accidentally tapped my card and the clear liquid went all over my image!    So I had to pull it off and then stamp and color it again.    


The second time I used Glossy Accents and I have a really large bottle of Glossy Accents.    I had not used it in a while and I guess it had a lot of air in it and created a ton of bubbles when it dried.   I could not believe it! I was not going to stamp and color this image again so I just went with it!   Sometimes you have to take the lemons that life gives you right and be ok with it.   I am going to just pretend that it was intentional, right?  It adds character :-)  I die cut a bigger moon using a circle die and then I finished it off with some Pretty Pink Posh sequins.    


Thanks for stopping by!    


Reverse Confetti - One Day Valentine Sale!

Reverse Confetti is having a Valentine's Day Sale!  Get $5.00 off your order of $30 or more.   Use the code below.   I thought I would share some of my favorite Reverse Confetti items and projects made with them!   


 Reserve Confetti has such a unique style and I love creating with Jen's products!   One of my favorite things to do is color images, so of course I am going go first to Dawn Machell images! 


 I am sharing below a few of my favorites and some of the projects that I made with them.    (Who am I kidding - I love all of Dawn's sets!) 😍  And given any time of the year, my list will likely change because there are several holiday images that I just love! 


Click on the date link below each photo to see the original blog post with all the supplies used! 


Are they not adorable!   They are super easy to color and I love pairing them together on a card! 


Who wouldn't love a Cheetah with heart shaped spots!   They are so adorable and I love the little bird with the heart wing! :-)


I love dinosaurs!   This goes back to my childhood, I am going to show my age here, but who  remembers Danny and the Dinosaur book!  I have two boys and they loved Jurassic Park!   So I will gravitate to anything with a dinosaur on it!  


I *Heart Heart* Love Snowmen!   I have a huge Snowman Collection, Snowman Ornaments, Snowman plates, cups, shirts!  The list goes on and on and on!   These snowmen are so sweet.  You can stamp one or a pile of them!    


I hope that I have inspired you!  Take advantage of the special discount code and  have fun shopping! 

Happy Valentine's Day!


SaveSave