Tuesday, May 26, 2020

Club La-La Land Crafts May 2020 First Look

Today is the reveal day for the new Club La-La Land Crafts May 2020 kit!   This month's theme is so adorable with a farm fresh feel!   I have two projects to share with you using the new May kit.   

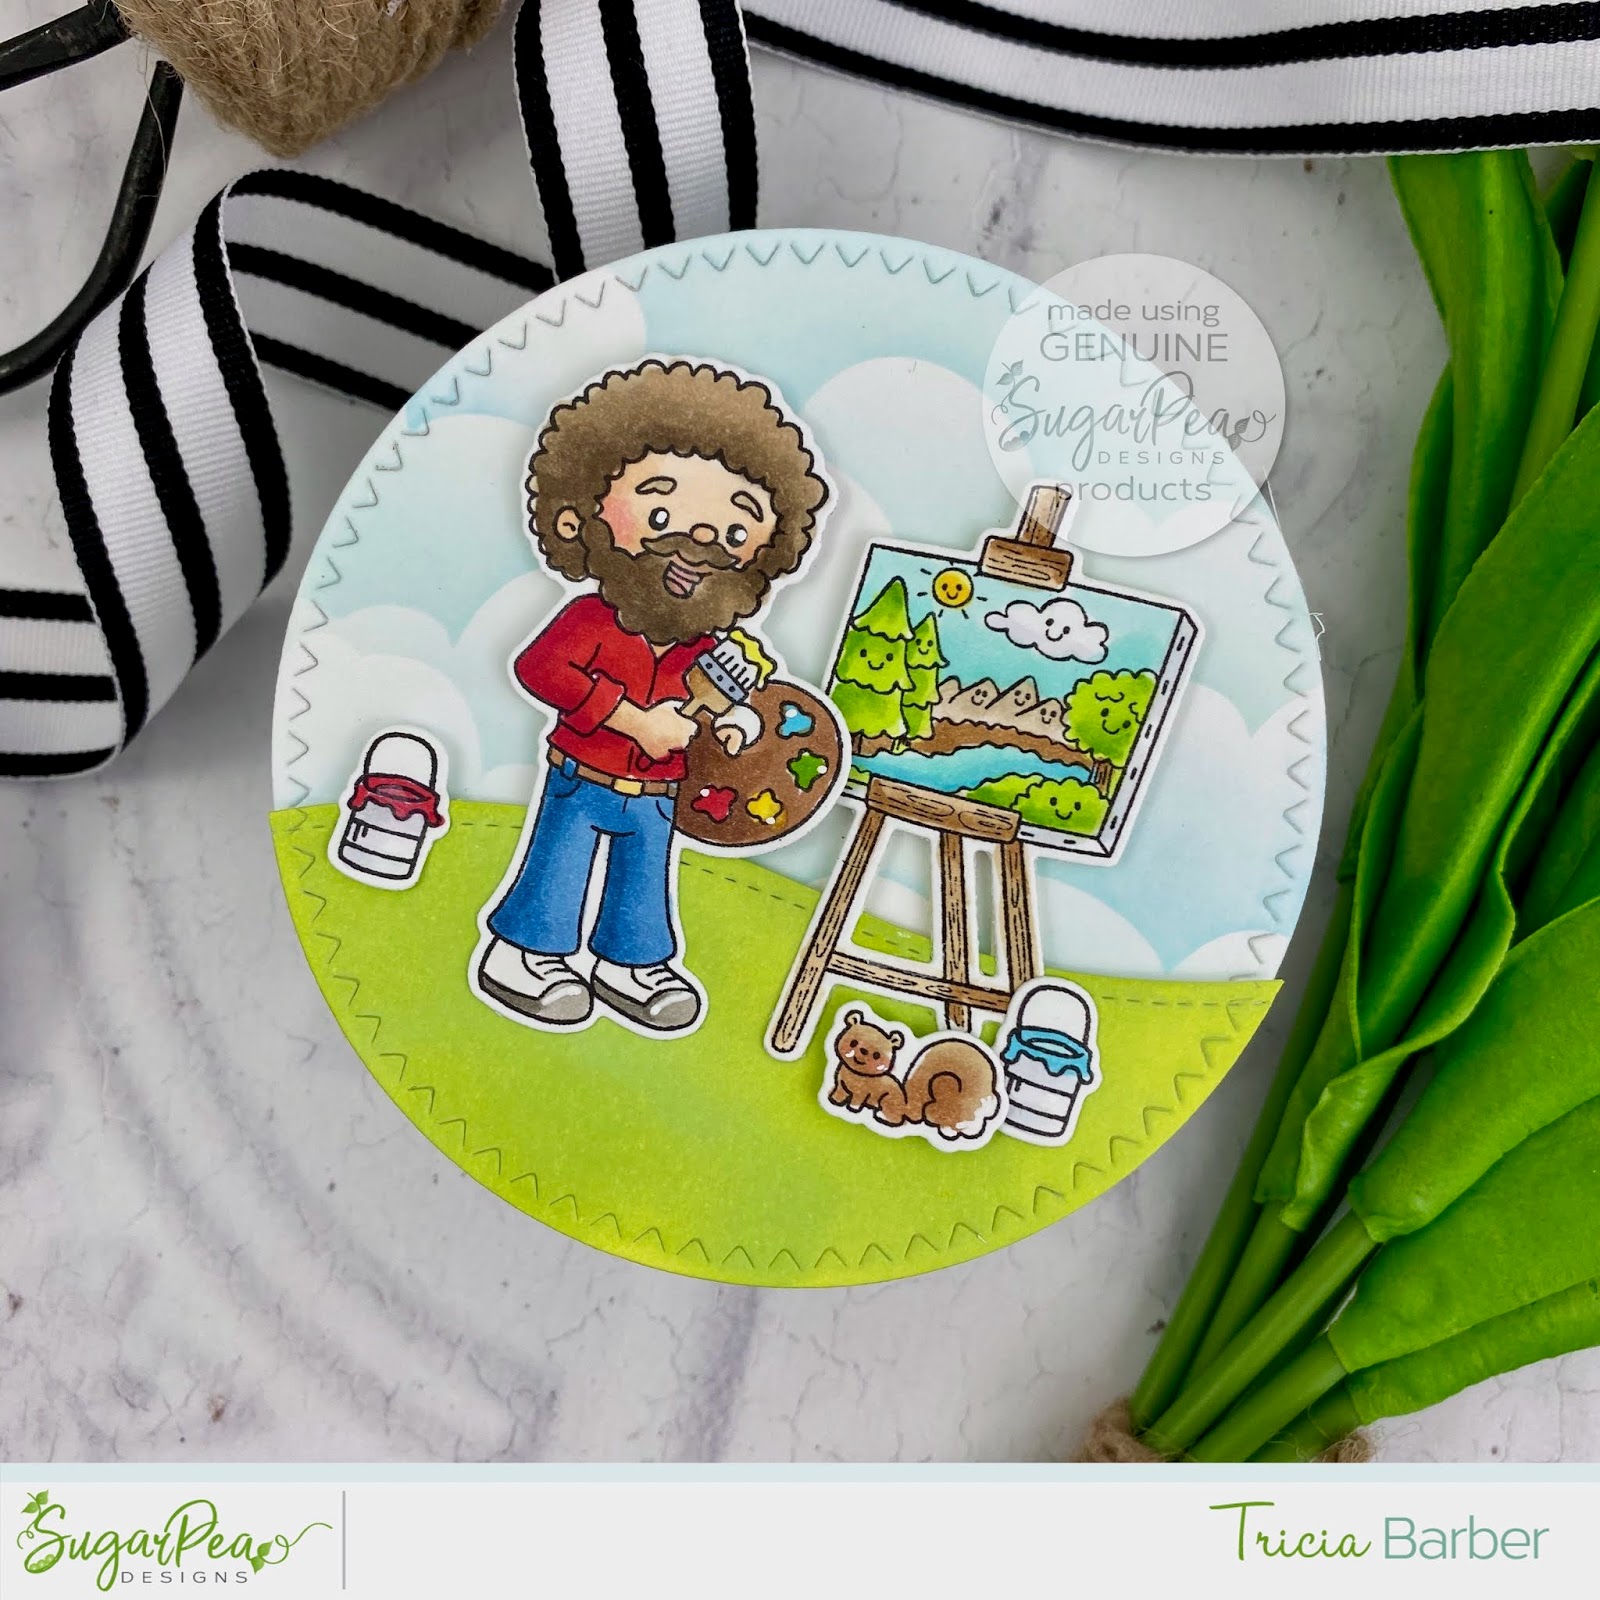
First up is a slimline card that I made with both of the stamps sets:  Farmer Marci and Carrot About You.  I colored my images with my Copic markers.   You can see the full list of Copics used below.   I add details to Farmer Marci by coloring her overalls first and then used some jean material with Copic Blender solution on it and dabbed her colored jeans to give them the jean material texture.   I added details to her bandana with a fine tip Sharpie and white gel pen.   


The bunny and carrots were colored with the Copic markers and I made sure that I had a whole multiple images of the carrots for the card - since I knew I was going to use the sentiment "Oh crop!" 

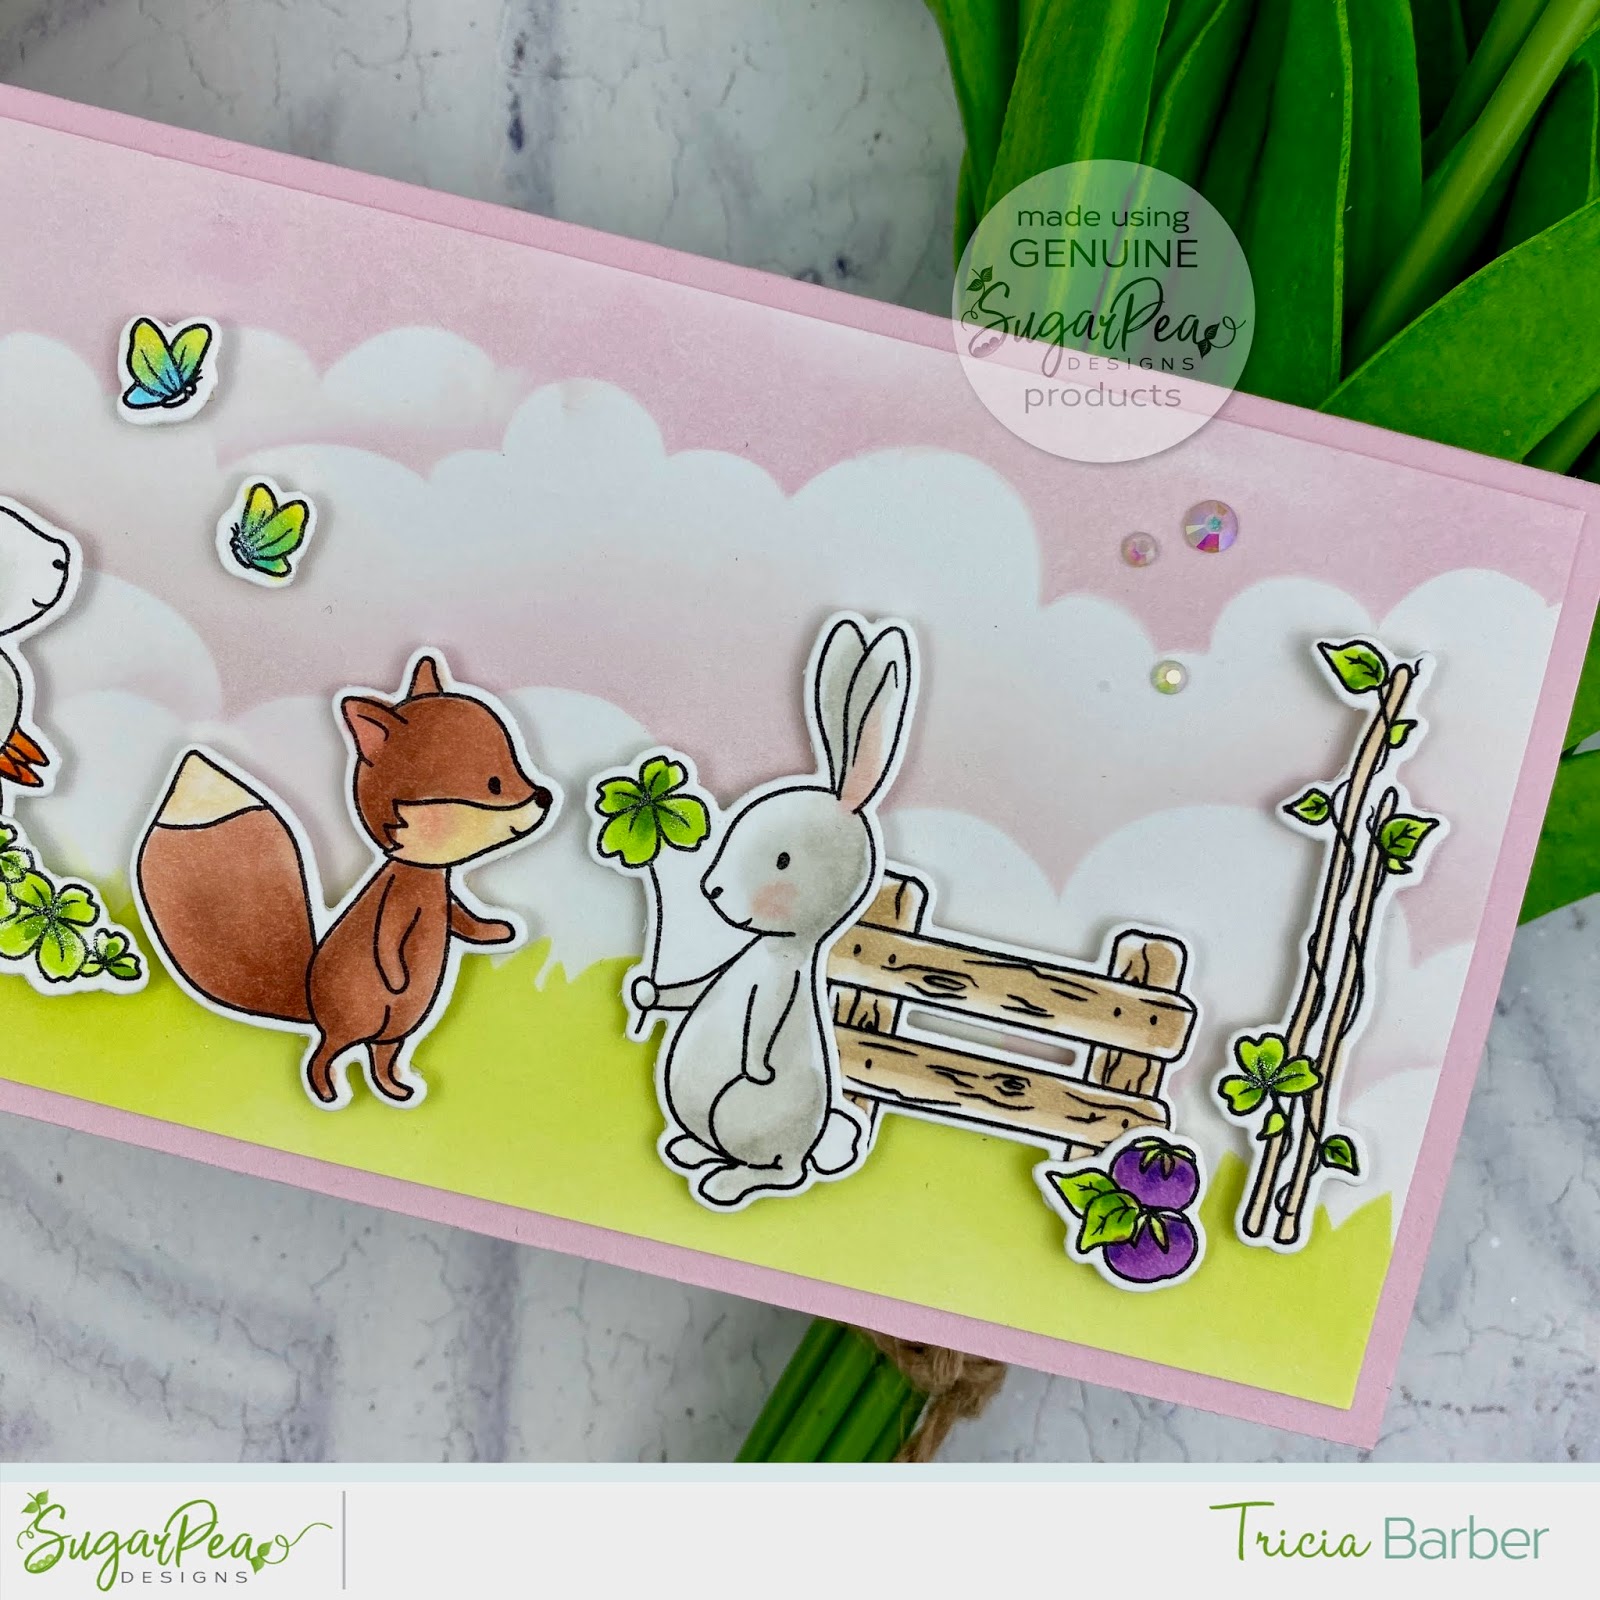
To create the card panel, I die cut several pieces of white card stock with the Double Stitched Hill Border Die.   I made sure that they each had space in between to layer up all my images.  I used Distress Oxide Inks in Vintage Photo and Antique Linen for the dirt, Mowed Lawn and Twisted Citron for the grassy knoll.   


With the Stitched Cloud Border Die, I die cut a piece of card stock and then used it as a stencil to add my clouds with Distress Oxide ink in Salty Ocean.    I die cut the Barn Die from dark red and white card stock and then adhered the pieces together with liquid adhesive.  I backed the windows with some kraft colored cardstock.   I added this to the top of the grassy.   


I splattered the grassy and dirt areas with some watered down paint.   Farmer Marci and the cute little Bunny from Carrot About You was added to the card with foam tape.   I added a few crystal jewels to finish off the card.  The sentiment was stamped from Carrot About You rubber stamp set and then I die cut it out with the banner die from Stitched Elements.


Copics Farmer Marci
Face, Arms, Legs E000, E00, E21, E11, R20, R21, R83, R85
Jeans B91, B93, B95, B97, B99, 0
Bandana R24, R27, R29
Hair/Boots E30, E31, E33, E35, E37, E50, E51
TShirt C0, C1, )
Shirt Y06, E23, YG13, BG000

Copics Bunny & Carrots
Bunny W00, W1, W3, E02, R20, E43, E44
Shovel E30, E31, E35, C0, C1, C3
Boots E30, E31, E35
Carrots YR04, YR07, YR09, YR18, YG17, YG06, YG01


Next up, I used the Carrot About You along with the Truck Die.   I created an A2 sized card with some of the beautiful new patterned papers from Spring Has Sprung paper pack.  I die cut the Truck from white Neenah card stock and then colored it with my Copic markers.   The powdery blue vintage truck went nicely with the patterned papers.    I adhered the Truck together with liquid adhesive and then popped it up on the card with some foam tape.   


The bunny was the same bunny I used in my first card, there is another adorable image in the stamp set holding a carrot - my next set of cards uses that adorable bunny!  The full list of Copics used for the Truck and the bunny from Carrot About You is listed below.   


I created a pocket for the card so that you could add additional sentiments or you could add a gift card to the pocket created with the Curved Pocket die cut.   I just created a little panel made with some more of the beautiful Spring Has Sprung paper pack along with a tag reinforcer from the Stitched Tags die.  The pocket was layered onto a Scalloped Rectangle die cut.   The little panel inside the pocket was made using the same Scalloped Rectangle dies.


The sentiment was stamped onto a stitched rectangle from the Curved Pocket die set.   I added some more details to the card panel by layering more patterned paper with a Scalloped Rectangle die cut that had been trimmed down.   For my Project Tutorial this month, I give you the full details on how to make this card!    If you subscribe and get the May Kit - each of the designers will share a full project tutorial with you!   


Copics -
Bunny W00, W1, W3, R20, E02
Boots E30, E31, E35
Shovel E30, E31, E35, C0, C1, C3
Truck B00, B01, B02, C0, C1, C3, C5, C7, E35, E33, E30


Please check out the rest of the team's creations over at the La-La Land Crafts Blog.  You can also find great inspiration over at the Club La-La Land Crafts Facebook Group and on Instagram as well. 

Here are the details if you would like to order the May Kit!   

This month's kit comes with two stamp sets: 
Farmer Marci 
Carrot About You 

Along with two dies: 
Truck Die 
Barn Die 

Club La-La Land Crafts is a MONTHLY Subscription for the EXCLUSIVE KITS from La-La Land Crafts!   Each month you will receive a package with a kit based on your choice of subscription plan - Stamps and Dies, Stamps Only or Dies Only. 

Project Tutorials are included every month from the Design Team.  You will receive a link to download pdf documents with step-by-step project instructions to make projects designed for you by the Club La-La Land Crafts Design Team!  **Link HERE to the Club La-La Land Subscription page**


The full value of this kit is $68.99
with the Stamps only is $24.00
with the Dies only is $44.99

Thru the Club La-La Land Subscription you pay: 

Product Kit - Stamps and Dies - $39.99
Stamp Kit - Stamps Only - $19.99
Dies Kit - Dies Only - $29.99

The last day to subscribe for this kit is June 10th! 


Check out this Youtube Video for a closer look at the kit!  Thank you for stopping by!  

Monday, May 25, 2020

Whimsy Stamps - May Mini Release


Happy Memorial Day!   Today is another mini release with Whimsy stamps.   I used the new UGH Word and Shadow die along with the new Comic Speech Bubbles Die with the Bearing Gifts stamp set.


I thought this little bear from Bearing Gifts was perfect for the UGH Word and Shadow die.   The letters that are cut out are meant to layer on top of on another for a cool look!   


I started off with the Starring Hearts Paper Pack and picked a couple of patterned papers to create my card panel.   I love the color combination here with the mustard yellow, hot pink, black and white.    I trimmed the mustard patterned paper to fit the full front of the panel.   I trimmed another piece of black and white patterned paper down to about 2 inches and then added a strip of back stock to one side.   


I die cut the Pierced and Stitched Circle Die Set and die cut one circle from white cardstock and one a scrap from hot pink cardstock.   I die cut the UGH from black cardstock and then die cut the shadow from white cardstock.   I layered the black letters onto the shadow die cut and they will slightly overlap one another.    This was popped up below the bear from Bearing Gifts.


I stamped my sentiments from Bearing Gifts onto two of the Comic Speech Bubbles die cuts and then popped them up with foam tape.  

Thank you for stopping by! 


Check out what the rest of the design team has to share with you today.    


Supplies:  

Affiliate links used at no extra cost to you! 

Pierced and Stitched Circles Die Set - Whimsy StampsBearing Gifts Clear Stamps6x6 Paper Pack - Starring Hearts - Whimsy Stamps

Friday, May 22, 2020

SugarPea Designs - Release Day!


It's release day at SugarPea Designs!  All the products are available today at 2 pm EST in the SugarPea Designs Store!   

This release have ton's of new products sure to make you happy..... I decided to use the new Happy Word Die and the new Happy Thoughts stamp set for today's rainbow inspired card!  


I started with a rainbow background on a slimline design card.   I stamped the sentiment directly to my panel panel that had been trimmed and popped up on foam tape across the length of the card.   


I split two more pieces of the white card panel and used foam tape to pop those up as well and separated them to add some interest.   


The die cut Happy Word die comes with a shadow die along with the word die.   They look so good together or you can just use the word die.   There are so many sentiments to choose from and this is one of my favorite ones!   


I finished the card off with some white Nuvo Drops!   Would you like to win $50 Gift Voucher to the SugarPea Design store?   Leave a comment below for your chance to win - Two lucky commenters will be randomly selected from the Sweet Peek Week comments to win a $50 Gift Voucher!   Winners will be announced on the SugarPea Designs Blog on Monday, May 25th.  


Audrey Tokach
Tricia Barber - You are here! 

Thank you for stopping by! 


Thursday, May 21, 2020

SugarPea Designs - Sweet Peek Week Day 4


Hello!   Welcome back to day 4 of the Sweet Peek Week for SugarPea Designs.   Today we have some beautiful products to showcase today.   There is a gorgeous new stamp set called Floral Envie stamp set and Floral Envie SugarCuts.   To pair with it today we have the new Handwritten Letter stamp.   


I started by stamping my Floral Envie stamp set onto Neenah cardstock and colored with my Copic markers.   I went with some light peach yellow and blues.   I also did a few of the accent images to add to the panel.    I stamped the sentiment from Floral Envie onto some light blue card stock and trimmed it down with the Enjoy Tag SugarCuts.  


The brown background piece was created with the Card Front Element Builder die and then stamped with the Handwritten Letter stamp.   To build my panel I die cut gold cardstock with the largest die from the Floral Envie SugarCut and then off set it behind the colored image.   


I popped up the little accent pieces around the image and then stitched the Hello sentiment with my sewing machine.    I added this panel to a light blue card base.    I love the soft and vintage feel of this card!   


Are you excited about the peeks so far?   This is the last day for our Sweet Peek Week!   Don't forget to hop along and comment before May 25th!    


Would you like to win a $50 Gift Voucher to our store? Leave a comment below for your chance to win. TWO lucky commenters will be randomly selected from the Sweet Peek Week comments to win a $50 Gift Voucher! Winners will be announced on the SugarPea Designs Blog: Monday, May 25th

That is it for me today!   Please be sure to check out today's post on the SugarPea Designs Blog for more information regarding the products and check out all the inspiration from the Design Team!  


Audrey Tokach
Tricia Barber - You are here! 

Thank you for stopping by! 


Wednesday, May 20, 2020

SugarPea Designs - Sweet Peek Week Day 3


Welcome to day three of the Sweet Peek Week at SugarPea Designs!    Today we are sharing Happy Trees, Happy Word Die and Happy Thoughts! 

Lot's happiness to spread around today!  I giggled when I saw the Happy Trees stamp set because it reminds me of you know who!    I used to watch him when I was little!   He was mesmerizing!  Right? 


I decided to make a circle card for a change, I used the largest circle die from the Zig Zag Stitched Circles SugarCuts.   Cut two and then score one at about 1/4 inch and this is where you will adhere the two together.   I cut an extra one to create the grassy area using one of the border dies from the Card Front Element Builder SugarCuts.  


I inked the circle with Distress Oxide Tumbled Glass ink with the Outdoor Scene Builder Stencil.   I inked the grassy cut circle with Distress Oxide in Twisted Citron.   This was popped up on the inked circle.   


I stamped the images from Happy Trees and die cut them out with the Happy Trees SugarCuts.   I colored them with my Copic Markers.   I stamped a sentiment from Happy Trees on the inside of the card. 


Would you like to win a $50 Gift Voucher to our store? Leave a comment below for your chance to win. TWO lucky commenters will be randomly selected from the Sweet Peek Week comments to win a $50 Gift Voucher! Winners will be announced on the SugarPea Designs Blog: Monday, May 25th


That is it for me today!   Please be sure to check out today's post on the SugarPea Designs Blog for more information regarding the products and check out all the inspiration from the Design Team!  


Audrey Tokach
Tricia Barber - You are here! 

Thank you for stopping by! 


Tuesday, May 19, 2020

SugarPea Designs - Sweet Peek Week Day 2

Hey there! Welcome to day two of the Sweet Peek Week with SugarPea Designs!  Today we are sharing Cottontail Cuties along with the new Outdoor Scene Builder stencil!  


I have been dying to share this card! I really love this stamp set, it is so adorable!   I stamped all the image from Cottontail Cuties onto Neenah cardstock and then colored with my Copic markers.   I die cut the images with the matching Cottontail Cuties SugarCuts.  I stamped several more of the images and colored them to help build my little scene.  


I used a Slimline card design so that I could get all those adorable images onto a card.  Here are the dimensions for creating a Slimline card below - 

Slimline Card DimensionsWhite Panel 3.5 by 8.25 inchesPink Card Base 7.5 by 8.5 inches1 sheet of 8.5 by 11 inches


I created the white panel by using the new Outdoor Scene Builder Stencil!   This stencil is so cool and has several unique features that will allow you to create ton's of scenes!   I inked with Distress Oxides in Spun Sugar and Twisted Citron using the cloud and grass borders from the Outdoor Scene Builder Stencil.  I stamped a sentiment from the Cottontail Cuties stamp set onto the inked panel.


Would you like to win a $50 Gift Voucher to our store? Leave a comment below for your chance to win. TWO lucky commenters will be randomly selected from the Sweet Peek Week comments to win a $50 Gift Voucher! Winners will be announced on the SugarPea Designs Blog: Monday, May 25th

That is it for me today!   Please be sure to check out today's post on the SugarPea Designs Blog for more information regarding the products and check out all the inspiration from the Design Team!   


Audrey Tokach
Tricia Barber - You are here! 

Thank you for stopping by!