Thursday, July 25, 2019

SugarPea Designs - Strike Up the Band

Hello everyone!   It's Tricia here today sharing a slimline card with you today!   I love summertime and especially love it when you have a bright sunny clear blue sky!  It always puts a smile on my face.   I wanted to recreate that bright blue sky for my little parade using the Strike Up the Band stamp set. 


I started out with a slimline card panel, which is 8 1/4 by 3 1/2 inch card panel and ink blended with Distress Oxides:  Salty Ocean, Mermaid Lagoon, Tumbled Glass, Twisted Citron, and Mowed Lawn.  The grass border was made with the Card Front Element Builder SugarCut with one of the border dies.   


I stamped the images from Strike Up the Band onto Neenah Solar White 110 lb cardstock and colored with my Copic markers.   I used the Strike Up the Band SugarCut to die cut the images out.   To add to my scene, I also used the Whatever the Weather SugarCut for the rainbow, clouds and sun.   The rainbow was colored with Copic markers, this is so much easier than die cutting from various colors of cardstock.   


The sentiment is from Strike Up the Band and was stamped in Versafine Onyx Black ink and then clear heat embossed.  I just love making these slimline cards and they will fit in a business size envelope.   They are so much fun when you want to create a scene card!  


Thanks for joining me today!   Happy crafting!   


Wednesday, July 24, 2019

Reverse Confetti - Lemonade Stand

Hey 'Fetti Friends!  I am over on the Reverse Confetti blog today sharing a new card project using the new stamp set, Lemonade Stand.   Check out the post on the Reverse Confetti Blog!   


Thank you for stopping by! 
Have a wonderful day!

Friday, July 19, 2019

Reverse Confetti - Inspiration Station!

Hey everyone!  Have you signed up for the Reverse Confetti Newsletter?   We share projects only available to newsletter subscribers!    To sign up,  to to the Reverse Confetti Blog here and go to the bottom of the page and enter your email address!    

Here is a little peek at my project! 


Wednesday, July 17, 2019

Reverse Confetti - Let's Shellabrate


Hey there!    I am still loving the last release from Reverse Confetti and created a slimline card today with the new Let's Shellabrate stamp set!   My card panel measures 3.5 inches by 8.25 inches.   I started by stamping the images from Let's Shellabrate onto Bristol Smooth card stock and clear heat embossed them.   


I used my Zig Clean Color Real Brush markers to watercolor the images.   I die cut them out with the Let's Shellabrate Confetti Cuts. 


I knew that I wanted to create a beach scene for my card and went looking thru my Reverse Confetti dies to see what I could use.    I went with the Edge Essentials to die cut my beach edges.    I used the Double Edge Scallop border to create my beach waves by using the negative die cut from the large border side.  


 I used Distress Oxide inks to for my sand and water.    For my sky, I just ink blended with some more Distress Oxides inks in the corner and added some die cut clouds using the Over the Rainbow Confetti Cuts.  Distress Oxide colors uses: Antique Linen, Rusty Hinge, Blueprint Sketch, and Mustard Seed.   


My sentiment is from Let's Shellabrate and it was white heat embossed onto some Salsa card stock. That is it for me today!   What is your favorite set from the new release?   


I am entering this card into the Simon Says Wednesday Challenge - Make Your Own Background Challenge featuring Tim Holtz products.  


Wednesday, July 10, 2019

SugarPea Designs - Mix It Up Challenge - Mermaid Kisses

Hey there!   There is a new Mix It Up Challenge at the SugarPea Designs blog!  I loved the inspiration photo this month and decided to use that for my card this month!    


I love summer and itching to go to the beach.   I knew that I wanted to create the look of the ocean when the sun hits the water and it sparkles!   I used the new Wave stencil and ink blended with several blue inks onto some light blue cardstock.  After ink blending, I covered the entire panel with Nuvo Moonstone Glitter Paste and set it aside to dry.    Just look at all that sparkle!  


I stamped the images from Mermaid Kisses out onto Neenah card stock and colored with my Copic markers.   I colored her just like Ariel from Little Mermaid!  I stamped a few little details from the stamp set using blue inks.   I die cut all my images out with the Mermaid Kisses SugarCuts.   


 I stamped a sentiment out onto a strip of black card stock and then white heat embossed it.    I trimmed my inked and glittered panel down and layered it onto a white card base.   I adhered it to the right of the card panel for a change.  I just love all the sparkle from the glitter paste!  So much fun!   

I hope you get a change to play along with the challenge this month!  There is a $50 gift certificate to the July winner - see the rules below.   Happy Crafting!   


Monday, July 8, 2019

Reverse Confetti July Release Blog Hop!

Hello there!  The Reverse Confetti July Release products are now available for sale!   Today we are hopping along and sharing more of the new release products.   This is one of my favorite sets from the release - Hippo Party!   I could not wait to color this set up again!   As soon as I saw the float in the set, I knew that I wanted to color it up bright pink!  


I stamped the images from Hippo Party onto watercolor paper and then clear embossed them to color with my Zig Clean Color Markers.  I colored several images to create a pool party.   I added some details with a white gel pen.     


The new Pool Confetti Cut was perfect for my little pool party!   I used RC Aqua and White card stock to make the pool.   I used the Over the Rainbow for my sun.  I created my grass using the Nuts About You Confetti Cut.   


We have a full Blog Hop for you today sharing the new release!   Hop along next to Kelly Lunceford! I cannot wait to hop along myself!  All the new products are now available for sale today!  


I hope you have a wonderful day!!!  


Sunday, July 7, 2019

Countdown to Confetti Bold Blooms & Sentimental Sayings


Welcome to the third day of the Countdown to Confetti July Release!   This is the final day the previews of the new products that will be available for sale on July 8th!  We are sharing the new Bold Blooms stamp set along with the new Sentimental Sayings.    I am also sharing the new Bubbles Cover Panel.  I also used some of the new Sun & Sea Patterned paper pad.   


I stamped out the flower images from Bold Blooms with several different Reverse Confetti inks:   I used Sunshine, Coral, Peach, Flamingo, Iced Aqua, and RC Aqua.  


I used the Bold Blooms Confetti Cut to die cut them out.   
The new Bubble Cover Panel is so unique.  I die cut it from the orange and white card stock.   I used some of the new Sun & Sea patterned paper and placed it behind one of the panels and then Iced Aqua behind the other.  


 For the orange card, I stamped a sentiment from Sentimental Sayings and tucked it under the floral images.   To finish off the card I added some Nuvo drops.


For the white card, I added a tiny strip of the Sun & Sea patterned paper to the bottom of the card.   I stamped a sentiment onto the inside of the card from Sentimental Sayings.   I added the floral images from Bold Blooms to the front of the card and finished it off with some crystal jewels.   


Don't forget to leave comments on all the designers blog post today to be eligible for a prize!   The release will be available on July 8th along with a blog hop to celebrate. Reverse Confetti will be giving away a $15 gift certificate to one blog commenter and to one Facebook commenter.  So be sure to visit the Facebook page as well!  Comments will close at noon on July 7th.   A winner will be announced at 5 pm CST on the Reverse Confetti blog!  


Saturday, July 6, 2019

Countdown to Confetti - Hippo Pool Party, Lemonade Stand, & Let's Shellabrate

Welcome to day two of the Countdown to Confetti's July release!   Today we are sharing three stamps sets that are all so super cute!      I have two cards to share with you today using the new stamp sets and along with a new Circle of Hearts Cover Panel.      These new sets are all from Dawn Machell!

For my first card, I made a slimline card using Let's Shellabrate and Hippo Pool Party.    The size of this card will still fit in a business size envelope and allowed me to create a cute beach scene with both sets!   My card panel size is 8.5 x 3.75 inches. 


 I ink blended with Distress Oxides in Peacock Feathers, Tumbled Glass, Antique Linen and Vintage Photo.   I blended the colors towards the center but left the middle with a white highlight to mimic a beach.   I splattered it with some water droplet's and then set it aside to dry. 


 I stamped the images from Let's Shellabrate and Hippo Pool Party onto Bristol Smooth cardstock with Versafine Onyx Black ink and clear heat embossed it.   I then colored them with the Zig Clean Color Real Brush markers.    The clouds are from Over the Rainbow Confetti Cuts.   The images for the beach grass and the posts were glued down directly onto the panel along with the beach umbrella.  Everything else was popped up on the card with foam tape.


  I added some Nuvo Crystal Glaze to the sunglasses and pearl in the oyster.    I added some clear sparkle to the umbrella, ball and basket.     My little Hippo is all set up for her beach day!    The sentiment was white heat embossed and came from the Hippo Pool Party.   I added  more details with a white gel pen.


For my next card, I used the new Lemonade Stand and the Circle of Hearts Cover panel.  This set is so adorable and I love the new Zebra image!   


I stamped my images onto Premier Polar White card stock and then colored them with my Copic markers.   I die cut them out with the Lemonade Stand Confetti Cuts.   For my card panel and base, I die cut the Circle of Hearts Cover Panel with white card stock and backed it with Bumblebee card stock.    I added this to a white A2 card base.   


 The sentiment was stamped onto Salsa card stock and white heat embossed.   I die cut the edge with the Edge Essentials Confetti Cut.   I added details with a white gel pen and clear sparkle pen.   I love the Lemonade Stand Confetti Cut - did you notice that it cut out the interior of the lemonade stand? I love these extra details!


Aren't these the cutest stamp sets!!!!   and I love the Circle of Hearts cover panel!!!  

Don't forget to leave comments on all the designers blog post today to be eligible for a prize!   Be sure to return for one more day of sneak peeks.  The release will be available on July 8th along with a blog hop to celebrate. 


Reverse Confetti will be giving away a $15 gift certificate to one blog commenter and to one Facebook commenter.  So be sure to visit the Facebook page as well!  Comments will close at noon on July 7th.   A winner will be announced at 5 pm CST on the Reverse Confetti blog!  


Friday, July 5, 2019

Countdown to Confetti - Butterfly Blossoms & Happy Mail

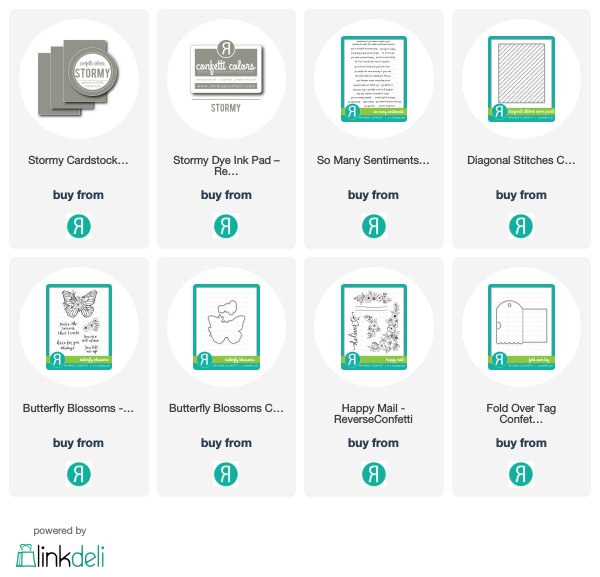
Today is the first day of the Countdown to the July Release from Reverse Confetti!  Today we are showcasing the Butterfly Blossoms and Happy Mail sets!!   These are two gorgeous sets!   I don't know about you but I love butterfly stamps, it does not matter what kind of butterfly, I tend to gravitate to anything butterfly!  When I saw the new Butterfly Blossoms stamp set,  I was so excited! Happy Mail is a new stamp set that you can use to decorate your envelopes or tags.   Of course you can also use the floral images on a card.   


I really love this image with the flowers intertwined with the butterfly.   I knew that I wanted my butterfly to really pop off the page, so I decided to go with a really dark background instead of a white background.   I went with Stormy card panel and then decided to stamp the image several times on the panel with Stormy ink.  I then die cut the panel with the Diagonal Stitches Cover Panel to add some texture to the background.   My sentiment was stamped onto the bottom right of the card panel with Versafine Onyx Black ink to get a really crisp sentiment impression and then I embossed it with clear embossing powder.   


   For the main image, I stamped and die cut the butterfly from Butterfly Blossoms and colored in with my Copic markers.   I really love bright blue butterflies,  you can find aqua to cobalt colored images when you search on line.   I went with the aquas and then colored my florals bright orange, yellow and red to make it pop!   I added it to the card panel with foam tape and that finished my card.  


With the new Happy Mail stamp set, I decided to make an envelope to match the Butterfly Blossoms card.   I used watercolor paper that is 80lb weight.  I used my envelope punch board to create an envelope for an A2 card.   I masked off the front panel of the envelope and then I then ink blended with Iced Aqua and Lagoon ink onto the watercolor panel.   I dried the panel with my heat gun to speed up the drying time.   


I wanted to stamp the images from Happy Mail with Versafine Onyx Black ink and clear emboss it so I tested it a few times to see if my embossing powder was sticking before stamping out the images.   A stamp positioner is really helpful when stamping onto watercolor paper, even with this 80 lb weight.    I did stamp it several times to get a really clean and crisp look to my stamping.    I used several different blues and aqua Zigs to color in the floral image from Happy Mail.   


I threw in a new tag die to complete the ensemble today.   This new tag die is  called Fold Over Tag Confetti Cut.   I die cut it from white card stock and then stamped the butterfly image from Butterfly Blossoms.   I colored it to match the butterfly on my card.   


I found a sentiment in So Many Sentiments that went perfectly with the sentiment on the card, Keep Smiling.   I made sure to stamp the butterfly so that the image went across the front and back panel.   I added some dot details with my Copic's around the image.  Now I have a card ready with a matching envelope and tag!   


That is it for me today!  Hop along today and make sure to leave comments as you go, the Confetti Crew and Fetti Friends are sure to fill you with inspiration! Be sure to return for the next two days of sneak peeks.  The release will be available on July 8th.


Reverse Confetti will be giving away a $15 gift certificate to one blog commenter and to one Facebook commenter.  So be sure to visit the Facebook page as well!  Comments will close at noon on July 7th.   A winner will be announced at 5 pm CST on the Reverse Confetti blog!