Monday, January 27, 2020

Whimsy Stamps - Voo Doo Too

Hey there!   I am popping in to share a card that I made with a new stamp set from Whimsy Stamps called Voo Doo Too.     This stamp set has two cute images and several sentiments that you can combine in different ways.   I used the new Starring Hearts paper pad for the patterned papers in my card.   I used one of the patterns to cover my card base and the other for the background of my main image.   


The image from Voo Doo Too was stamped onto Neenah 80 lb cardstock and colored with my Copic markers.    I create a base for the image using Wavy Edgers die.   I die cut the patterned paper and my ground with the Zig Zag Stitched Rectangles.   This was then put onto of some bright red cardstock.   


The sentiment was created by combining two of the sentiments from the stamp set.   Are you ready for Valentine's Day yet?    Be sure to check back with me soon as the February release will be launching soon at Whimsy Stamps!   I have some really cute projects to share with you!    


Thank you for stopping by!   


Supplies: 


affiliated links used at no extra cost to you! 

Friday, January 24, 2020

SugarPea Designs Sweet Peek Week - Day 5

Today is the last day of the Sweet Peek Week at SugarPea Designs!   Today we are sharing Friendship Sentiments, Friend(s) Word SugarCut and the Interlocking Circles SugarCut.   


I started off by ink blending a panel of Distress Oxide inks in Antique Linen, Evergreen Bough and Black Soot.   I then die cur the Interlocking Circles SugarCut twice from white card stock.  I then adhered the die cut to the top and bottom part of the panel.  I trimmed the panel down to 3 3/4 inches by 5 inches.   I adhered it onto a white card base.  


I then die cut the Friends Word SugarCut from black card stock and then the shadow from white card stock.   I stamped a sentiment from Friendship Sentiments and white heat embossed it onto a strip of black card stock.  The sentiment stamps so crisp and clean! I then popped up the Friends die cut and the sentiment strip with foam tape.  I added some Crystal Darice Sequins to finish off the card.  


Well that is it for today!   The new release will be available tonight at 6 pm EST.    Please check out SugarPea Designs Blog for todays final Sweet Peek post and check out all the inspiration from the Design team!     What is your favorite from the new release?    


Thank you for hanging out with me this week!   


Thursday, January 23, 2020

SugarPea Designs Sweet Peek Week - Day 4

Welcome back to day 4 of the Sweet Peek Week at SugarPea Designs!   Today we are featuring Jukebox Jive and Vintage Jukebox!  I created a card with the new Jukebox Jive stamp set and coordinating SugarCut.    


I started by stamping a white card panel with the checkerboard stamp repeatedly with aqua ink.  My MISTI made it really easy to do this.   I marked where the paper was positioned and moved my card panel up and continued to stamp until I had the desired checkered height.   I then stamped the record and musical notes repeatedly over the top of the panel.   I trimmed the panel down with the Zig Zag Stitched Rectangle SugarCuts.   I added s small strip of yellow card stock and then created another yellow panel to go behind the Zig Zag Stitched Rectangle.   


I stamped the jukebox and ice cream sundae onto Neenah Solar White and then colored with my Copic markers.   I went with a rainbow of colors for the jukebox after I googled images for different jukeboxes to get some inspiration.  I covered all the rainbow colored parts with my Spectrum Noir Clear Crystal sparkle pen.   I die cut the images using the Jukebox Jive SugarCut.   


The sentiment is from Jukebox Jive and was white heat embossed onto black cardstock.    I finished it off with clear crystal sequins.  


That is it for me today!   Please be sure to check out today's post on the SugarPea Designs Blog for more information regarding the products and check out all the inspiration from the Design Team!   

Thank you for stopping by!  We have one more day of Sweet Peeks and the full release will be available on Friday, January 24th at 6 pm EST.   


Affiliates links used at no extra cost to you.  All new products will be available on January 24th at 6 pm EST.  


Wednesday, January 22, 2020

SugarPea Designs Sweet Peek Week - Day 3

Welcome back to day three of the SugarPea Designs Sweet Peek Week!    I have a trio of fun to share with you today using the cutest stamp set! :-) 


I made three little circle cards using the new Pandamonium stamp set along with the new Bamboo Garden SugarCut.    I started off by using Distress Oxides and coloring three circles that had been die cut with the circle die from Bamboo Garden.   Each was then layered with the Bamboo Garden SugarCut that had been die cut from white card stock.   I added a gold embossed heart to each one using a little heart from Sentiments of Love stamp set. 


I stamped three of the pandas and added some details with my Copic markers.    I then stamped and white embossed three sentiments from the Pandamonium stamp set and trimmed them down.   


The kraft circle card panel is made by using the largest circle die from the Zig Zag Stitched Circle.   I die cut two of them and scored 1/4 inch from the top of one to create a hinge and adhered both circles by the hinge.   I then added my colored Bamboo Garden circles and popped up the panda's and sentiments with foam tape.   


I love making little cards like this!    

Please be sure to check out the SugarPea Designs Blog for more details on the products today along with a giveaway!   There is more inspiration with the products today from the design team and be sure to comment along the way!   

Tricia Barber
Vera Yates

Thank you for stopping by!   Be sure to come back Thursday and Friday for the final days of the Sweet Peek Week! 


New products will be available January 24th at 6 pm EST.  Affiliate links used at no extra cost to you! 


Tuesday, January 21, 2020

SugarPea Designs Sweet Peek Week - Day 2

It's day two of the SugarPea Designs Sweet Peek Week!   I am sharing peeks of new products that will be available on Friday, January 24th.   I have a sweet card to share with you today featuring Wheelie Amazing stamp set and SugarCut.   


This stamp set features a bicycle that you can build on your own and cute little accessories that go with the bike.   I stamped mine in black ink and then colored with my Copics.   See all the inspiration that the design team had with this stamp set!    


I had to use the cute little puppy and colored her as a yellow lab.   She remind's me of my lab's that we had when they were puppies -- they were super cute and got into a lot of mischief!  :-) 


I also colored the basket of tulips and added to the back of the bicycle.   This reminded me so much of Spring!  (We had a taste of Spring last week but it's cold again now!)   


I used the starburst stamps from Cheers to You and stamped them in aqua ink.   I added some aqua jewels to the centers - I thought they looked like fireworks going off in the sky.   I stamped a sentiment from the Wheelie Amazing stamp set onto a Zig Zag Stitched Rectangle.   I then added my stamped and colored images from Wheelie Amazing to the rectangle.   I had this butter colored cardstock in my stash and loved the soft tones.   I used one of the new stencils (sneak peek) to add some texture to the buttery Postage Stamp panel.   I added this to a kraft card base.   I then added some red and white twine to finish it off.    

There is so much more inspiration on the SugarPea Designs blog and the Design Team posts - see the full list below.   Check out the SugarPea Blog for more information on today's products as well as information on a chance to win this week!   


Thank you so much for stopping by today!   Be sure to come back tomorrow for a trio of inspiration! 


Affiliate links used at no extra cost to you - new release products will be available on January 24th at 6 pm EST. 

Monday, January 20, 2020

SugarPea Designs Sweet Peek Week - Day 1

Hey there! It's Sweet Peek Week at SugarPea Designs and I will be sharing projects this week featuring the January release!   I have so much fun things to share with you.    Today we are sharing projects featuring a new stamp set called Later Gator and a new Leaf Canopy stencil. 


Later Gator has a cute alligator image along with many smaller images that you can use to create all kinds of cute little scenes with him.   There six sentiments in the stamp set.  I colored him up for a cute birthday card.    I went with pinks and greens for my color combination.   I started my project by die cutting a white card panel with the Card Front Element Builder and then ink blended with the Leaf Canopy Stencil.    I used Distress Oxides in Mowed Lawn and Twisted Citron. 


I stamped and die cut the Later Gator and colored with my Copic markers.   I gave him a cute little pink belly.   He has a birthday balloon, present and ice cream cone that were all stamped from the Later Gator stamp set and die cut with the Later Gator SugarCut.   


I added my ink blended panel to a kraft card base and then off set my Zig Zag Stitched Circle on the panel.   I added the gator, balloon, present and ice cream cone with foam tape.   The sentiment was stamped and white heat embossed onto some hot pink cardstock and then die cut with a label die from the Envelope Liner SugarCut.   I finished the project with some crystal jewels and my white gel pen.   I will be sharing projects thru each day this week with the full release available on Friday, January 24th!    


There is so much inspiration for you today from the design team!    Please see the full list below and be sure to comment along the way for a chance to win!    See the full details on the SugarPea Designs Day 1 post here!   Be sure to come back each day with our final sweet peek on Friday!   The new release will be available at 6 pm on January 24th! 

Thank you for stopping by!  


affiliate links used at no extra cost to you!  

Sunday, January 19, 2020

Technique Tuesday - Love-ly Promotion!

Hey there!  Technique Tuesday is celebrating Valentine's Day and love themed projects this month!   I am joining them and sharing several Love-ly's using some of the love themed products!   I have three projects to share with you today and I had so much fun creating these!   Also - I will have a coupon code to share with you!  


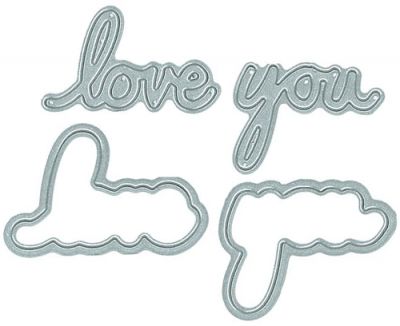
While I love spending time coloring images and creating scene cards,  I also really love making truly simple cards.   I used the Say It 2 Love You die to create this simple card using the die repeatedly across the card.    I trimmed several pieces of pink card stock to about 1 inches.   You can vary the size or use all the same size.  I adhered them to a piece of copy paper.   I trimmed the pieces down so that I had a really nice border around the panel.   


Say It 2 - Love You Crafting Dies


 I then die cut the Say It 2 Love You from white and gold foil cardstock and then adhered to to the panel!   I played around putting sequins and other embellishments but ended up loving just the simple cardstock and die cuts.   The Say It 2 Love You also has a shadow die that comes with it but I opted just to use the script die.   


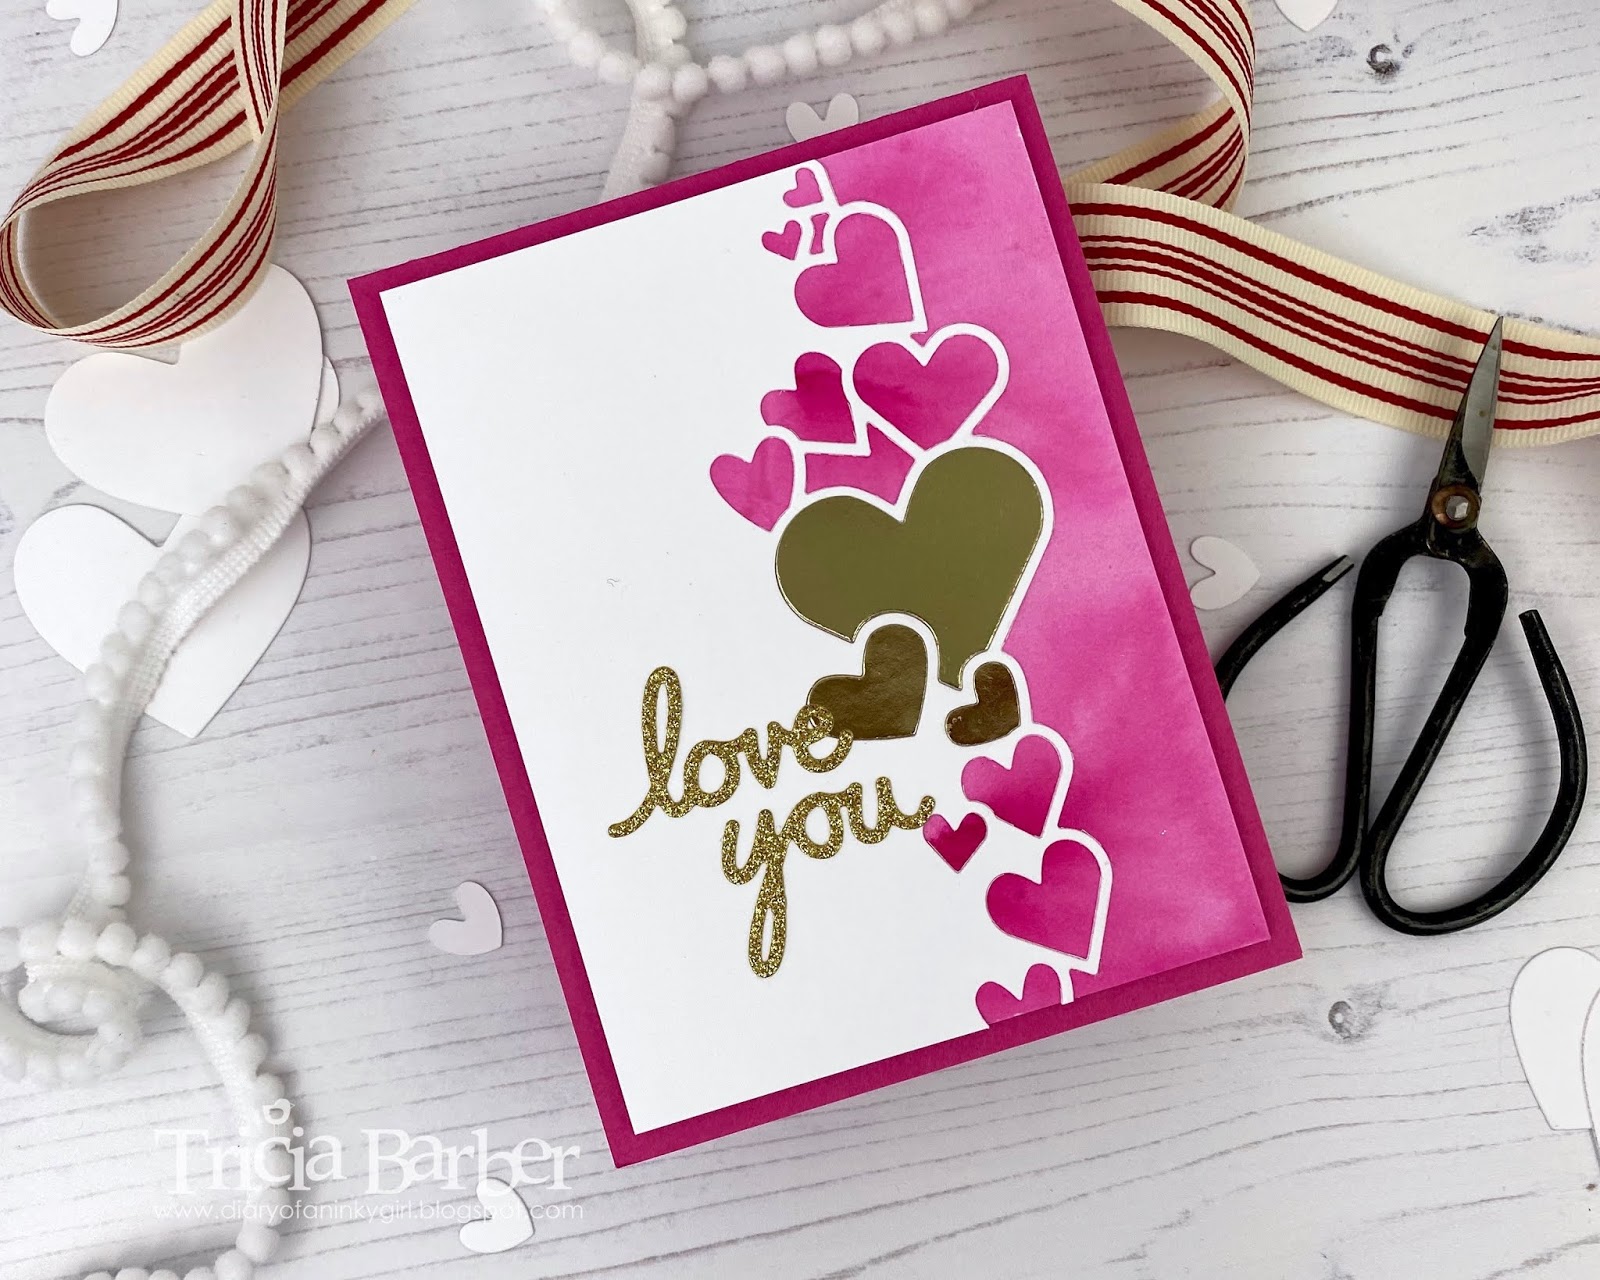
Next up, I used the Cascading Hearts Border die to create my next card.    I started with a piece of watercolor paper and used some shimmer powder to create the watercolor pink background.   Next I die cut a panel of white cardstock with the Cascading Hearts Border.   Save all those die cut hearts!  You will see why in my next project! :-) 

Cascading Hearts Border Crafting Dies


I then used some of my gold foil cardstock and strategically placed it with the die to die cut out several of the interior heart pieces from the gold cardstock.   I inlayed them back into the die cut and The white heart panel and the watercolored panel were adhered together with liquid glue.   I then inlayed the gold hearts.    I used the Say It 2 Love You die again and die cut it from glittered gold cardstock and added to the panel.   I added the panel to a dark pink card base.   I left it clean and simple for me! 


For my last project today, I used those left over heart pieces from die cutting the Cascading Hearts Border die and die cut a few more.   I colored them with my Copic markers in a rainbow fashion!  The hearts vary in size so I was careful to ensure what order I wanted them so I was in ROYGBIV order!  


Simply You 2.0 Stamp Set


I stamped a sentiment from the Simply You 2.0 stamp set onto a white card base.   It is hard to see in the photos but I used my scoring border to add a few scored lines to the card above the hearts and below the sentiment.    There are some great sentiments in his set that will cover all types of occasions and several accent images to use like the little heart arrow.   I could not resist on this card but added some clear sparkle sequins to the card! 


If you have made it to the end of the post, I have a coupon code for you! 

The coupon code is good for 20% off everything in the Love Category! 

Coupon Code is Love2020


Thanks for stopping by!